Top 10 Ways to Remove Thermal Paste From CPU Pins?
Thermal Paste On Pins can turn a routine CPU installation into a careful cleanup job. A tiny smear may look harmless, yet residue between closely spaced pins can interfere with seating or make inspection difficult. The risk depends on the paste type, the amount involved, and whether the pins belong to the processor or motherboard socket. Conductive compounds, including liquid metal, need extra caution. Small details matter.
This guide introduces ten ways to remove thermal paste from CPU pins, from gentle dry cleaning to carefully controlled use of suitable cleaning solutions. It also explains what to avoid: scraping with metal tools, applying excess force, or rushing the drying process. Use a bright light and magnification where possible, and check the CPU or motherboard maker’s guidance before choosing a method. A soft, clean brush and high-purity isopropyl alcohol may suit some situations, but not every material or contamination does. There is no universal shortcut. If pins are bent, residue is packed into the socket, or you cannot identify the compound, stop and seek experienced repair help. That may feel inconvenient. It is often safer than turning a small cleanup into permanent damage. The goal is not merely clean-looking pins; it is a dry, undamaged processor that can be installed without force.
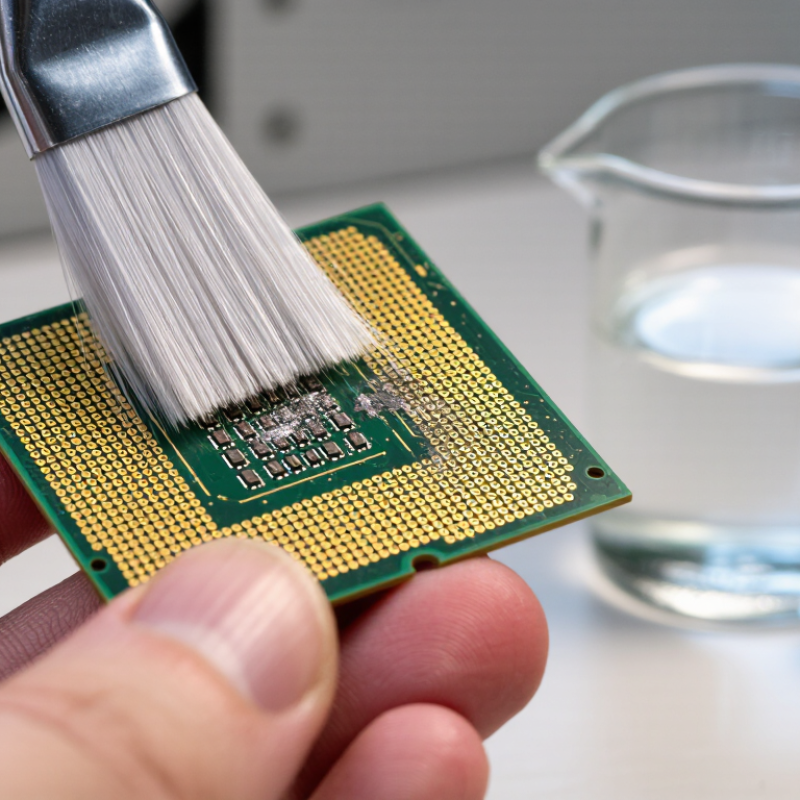
Assess the Contamination and Identify the Thermal Paste Type
Inspect the socket under bright, angled light before touching anything. A thin gray film across several pins differs from a blob bridging pin rows. Use a magnifier and note whether the material is dry, oily, crumbly, or glossy. These clues help, but color alone cannot identify its chemistry. Check the paste’s packaging or technical data sheet, if available. Silicone- or ceramic-filled greases are common; metal-rich compounds need extra caution because residue may conduct electricity.
Published values offer context, not a reliable identification test. Prasher’s 2006 review in Proceedings of the IEEE reports thermal conductivity around 1–5 W/m·K for many filled-polymer interface materials, with results varying by formulation and test method. ASTM D5470-17 measures thermal transmission properties; it does not identify a paste’s ingredients. A high advertised conductivity, therefore, cannot prove that residue is metallic or electrically conductive. I have found visual guesses easy to overtrust. They are imperfect.
Record the contamination’s location and apparent type before choosing a cleaning method. If paste sits only on the socket’s outer surface, the risk differs from material lodged between delicate pins. Avoid rubbing or scraping while assessing it; pressure can bend contacts or spread residue. When the formulation is unknown, treat it as potentially conductive and consult the processor or socket maker’s cleaning guidance. A clear photograph may help compare the affected area later.
Prepare a Safe Workspace and Gather Suitable Cleaning Tools
Before removing thermal paste from CPU pins, clear a dry, well-lit workspace and use an ESD-safe mat. Disconnect power, then ground yourself with a wrist strap connected to the mat. The ESD Association’s ANSI/ESD S20.20-2021 standard sets a maximum worksurface resistance to ground of 1.0 × 10^9 ohms. That benchmark helps manage static risk; it does not make delicate pins safe to touch. Keep drinks, loose metal tools, and paper towels away from the work area. Small details matter.
Gather 90% or higher isopropyl alcohol, lint-free swabs, a soft anti-static brush, and a magnifier. Use only a small amount of alcohol, applied to the swab rather than poured onto the socket or pins. A bright desk lamp helps reveal residue without forcing you to lean on the CPU. Keep a clean tray nearby for tools. I still find that rushing this setup is tempting, especially when the paste looks minor. It is a poor trade. Avoid metal picks and stiff brushes; they can bend pins or leave fibers behind. Let cleaned areas dry completely before reinstalling the processor. No shortcuts here.
Soften and Remove Paste with High-Purity Isopropyl Alcohol
Dried thermal paste on CPU pins can soften with high-purity isopropyl alcohol, usually 99% or higher. Power down the computer, disconnect it, and remove the processor before cleaning. Apply a small amount to a lint-free swab, then gently dab the paste. Let the alcohol work; do not scrape or bend the pins. A wooden toothpick may seem helpful, but one slip can deform a contact. Less is safer. If paste sits between pins, use a soft antistatic brush with very light strokes, following the pin rows.
Use good ventilation and keep alcohol away from sparks or heat. The NIOSH Pocket Guide lists isopropyl alcohol’s flash point as 53°F (about 12°C), so treat even a small puddle seriously. Avoid flooding the CPU or socket; liquid can carry paste deeper and take longer to evaporate. Wait until the pins look dry, then allow extra time before reinstalling. This is a judgment call: paste can look gone while residue remains near the base. Inspect under bright light and magnification, and repeat gentle dabbing rather than increasing pressure. If a pin is bent, stop cleaning and assess it separately.
Top 10 Ways to Remove Thermal Paste from CPU Pins
Soften and remove paste with high-purity isopropyl alcohol.
For aqueous solutions, the nominal water fraction is the remainder after the stated isopropyl alcohol concentration. Higher-purity alcohol contains less water, but does not guarantee better results for every thermal paste. Power off and disconnect the hardware; apply a small amount with a lint-free swab, avoid bending contacts, and let the area dry completely before use.
Clean Between the Pins Without Bending or Scratching Them
Thermal paste between CPU pins is easy to spread while trying to remove it. Shut down the computer, unplug it, and hold the processor by its edges. Work over a clean, well-lit surface. A desk lamp at a low angle can reveal residue hiding between the pins. Take your time.
Dampen a soft, anti-static brush with a small amount of high-purity isopropyl alcohol; it should not drip. Gently brush parallel to the rows of pins, using almost no pressure. Let the liquid loosen the paste. Never scrape with a needle, tweezers, or a wooden pick. Even a tiny sideways push can bend a pin.
Cotton swabs may leave fibers behind. Not ideal. If paste remains, repeat with a clean brush rather than pressing harder. Some compounds smear before they lift, which can look worse for a moment. That is frustrating, but forcing it usually adds risk.
Let the processor dry completely, then inspect it under angled light before reinstalling. If residue is hardened or a pin looks misaligned, stop and seek qualified repair help.
The safest cleaning is sometimes the slowest one.
Inspect the Pins and Let the CPU Dry Before Reinstallation
After removing thermal paste, inspect the CPU pins under bright, angled light and magnification. Rotate the processor slowly; residue can hide between pins or at their bases. Look for bent pins, dull deposits, and fibers left by a swab. Do not straighten a pin just because it looks slightly uneven. Compare its alignment with neighboring pins, and stop if you are unsure. A close-up photo can help reveal changes, though it is not a substitute for careful inspection.
If cleaning involved isopropyl alcohol, leave the CPU on a clean, dry, nonconductive surface until no liquid or visible residue remains. Give it more time in a cool, ventilated room; do not use heat or blow moisture into the pin field. Dry means dry. JEDEC’s J-STD-033D lists 168 hours at 30°C and 60% relative humidity as the floor life for certain moisture-sensitive components at MSL 3. That is a handling limit, not a CPU drying-time recommendation. IPC-7711/7721 rework guidance likewise emphasizes controlled inspection and workmanship, but it does not certify a pin field as clean. A tiny smear is easy to miss. Recheck under light before reinstalling, and reconsider the cleaning method if paste remains trapped or any pin appears damaged.