Skip to content
Menu Close

How to Choose a Tee Head Bollard for Your Project?

Choosing a Tee Head Bollard starts with understanding what the site needs to protect. A loading bay, pedestrian entrance, and landscaped walkway face different risks. The World Health Organization’s Global Status Report on Road Safety 2023 estimates that 1.19 million people die in road crashes each year. That figure underscores the importance of safer streets, but it does not show that any single bollard can prevent a collision. Site conditions matter.

NACTO’s Urban Street Design Guide presents bollards as one way to separate street uses and help manage vehicle access. For a project, the tee-shaped top may offer a clear visual cue and a convenient handhold, but appearance alone cannot establish protective performance. Check the manufacturer’s tested impact data, material, dimensions, anchoring method, and installation requirements. Also consider vehicle approach paths, ground conditions, spacing, visibility, and whether pedestrians can pass comfortably. Details count.

A neat drawing is not enough. A bollard’s performance depends on its full installation, not just its product description. Ask for test documentation that matches the intended use, and have qualified project professionals review site-specific risks. There may be trade-offs: stronger protection can require more substantial foundations, while close spacing can affect access and movement. That part is easy to overlook. This guide explains how to compare those factors and choose a Tee Head Bollard that fits the project’s actual needs, rather than relying on shape or marketing language alone.
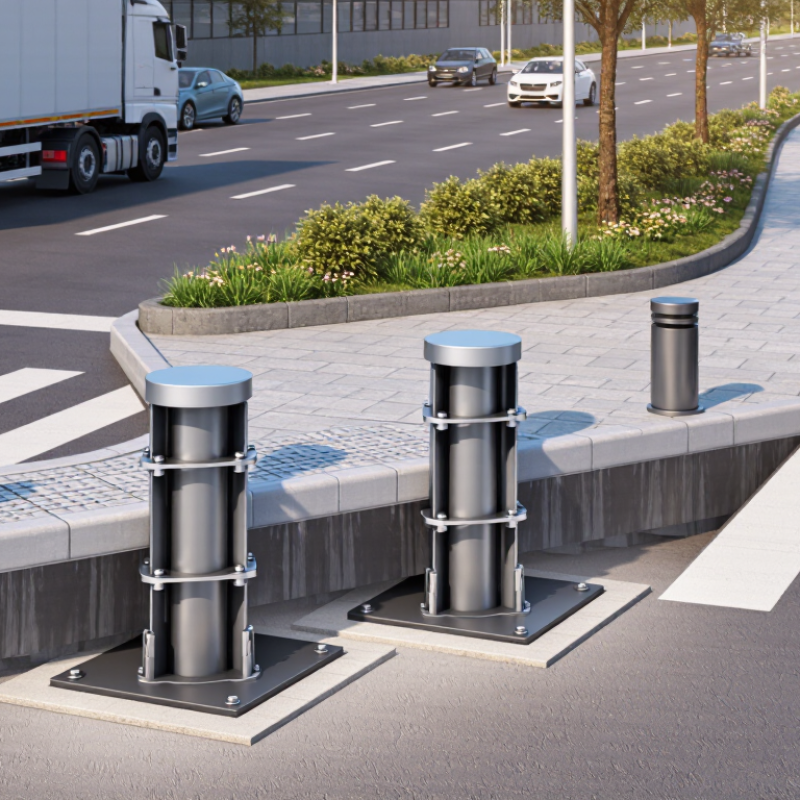
How to Choose a Tee Head Bollard for Your Project?

Understand the Purpose and Site Conditions for a Tee Head Bollard

A tee head bollard can guide pedestrians, mark a boundary, or support a chain between posts. Start with the job. A row beside a walkway needs clear spacing and good visibility. A post protecting a doorway may need a different height, fixing method, and level of impact resistance. Do not assume the tee-shaped head makes a bollard suitable for vehicle protection; check its specified performance.

Walk the site before choosing a model. Note the surface, slope, drainage, nearby doors, and the path people actually take. Measure clear walking space, including room for wheelchairs, carts, and delivery equipment. On a narrow pavement, a wide base or projecting chain can become an obstacle. Small details matter. Sunlight, rain, road salt, and frequent knocks also affect finish and maintenance needs.

Check what lies below the proposed fixing points. Paving may conceal services, while weak or cracked concrete may not hold an anchor securely. Confirm the ground and installation method with a competent installer. I have seen neat layouts look convincing on a plan, then feel cramped once people use them. Revisit the spacing on site, and consider whether the bollards still leave a safe, direct route.

Compare Bollard Materials, Sizes, and Structural Features

How to Choose a Tee Head Bollard for Your Project?

A tee head bollard’s material affects its appearance, maintenance, and resistance to wear. Galvanized steel is a practical choice for busy public spaces, where carts, bikes, and weather can mark surfaces. Stainless steel offers a cleaner finish and strong corrosion resistance, but usually costs more. Cast iron brings a substantial, traditional look; check its weight and installation needs. No material is maintenance-free.

Size should suit the setting, not just the drawing. A short bollard may disappear behind parked vehicles, while a tall one can interrupt sightlines or feel oversized beside a narrow path. Measure pedestrian routes, vehicle clearances, and the space between units on site. Small details matter. The right spacing depends on the intended use and should be checked against project requirements.

Look closely at the structure. A tee-shaped top can improve visibility and provide a clear visual cue, but its joint and welds need sound fabrication. For surface mounting, review the base plate, anchor layout, and pavement condition. Embedded designs need adequate footing depth and coordination with underground services. Specify wall thickness and finish as well as overall height. A tidy specification can still miss local ground conditions; that is worth checking before ordering.

Choose a Mounting Method and Installation Location

Choose the mounting method after checking the pavement, not just the bollard drawing. Surface-mounted units can suit sound, reinforced concrete where excavation is impractical. Confirm slab thickness, anchor embedment, and distance from edges before specifying them. In-ground mounting may provide a stronger load path, but requires checking buried utilities, drainage, and concrete depth. Measure twice.

Place the tee head where it protects people without narrowing the walking route or blocking doors, ramps, and sightlines. The 2010 ADA Standards set 36 inches as the minimum clear width for an accessible route. NACTO’s Urban Street Design Guide uses a 5-foot clear path as a common sidewalk target. These figures are useful checks, not a substitute for reviewing the actual site. A small shift can matter.

Map vehicle approaches, turning movements, snow storage, and maintenance access before fixing locations. For vehicle-impact protection, match the bollard’s tested performance to the project risk, and confirm that the mounting system supports that rating. A common planning blind spot is assuming the surface beneath a proposed bollard is adequate. Verify it on site; drawings can miss patched concrete, shallow services, or uneven paving.

Check Safety, Accessibility, and Local Requirements

A tee head bollard can help define a vehicle boundary, but its shape alone does not prove it will stop a vehicle. Start by identifying the actual risk, such as accidental driving onto a walkway or controlled vehicle access. Check documented impact performance, foundation details, and installation requirements for the specific model. A strong post with a poorly designed footing may not perform as expected. Don’t guess.

Accessibility needs equal attention. The tee-shaped top should be easy to notice against its surroundings, including in low light. Keep the bollard and its crossbar outside the clear walking route, and check that they do not snag bags, mobility aids, or clothing. Measure the space with nearby doors, curb ramps, and turning areas in use. A drawing can miss awkward pinch points.

Tips: Before ordering, ask the local permitting or public-works office about placement, visibility, underground utilities, and emergency access. Requirements differ by site. Have a qualified installer confirm the footing and clearances against the project plans. One detail teams sometimes overlook is maintenance: leave enough room to inspect the base and repair surrounding paving. Recheck the layout on site; it may feel different than it looked on paper.

How to Choose a Tee Head Bollard for Your Project? — Check Safety, Accessibility, and Local Requirements
Selection Factor What to Check Practical Guidance Project Verification
Purpose and risk level Decide whether the bollard is intended to guide pedestrians, protect equipment, control vehicle access, or provide impact protection. A standard decorative or access-control bollard should not be assumed to provide crash protection. Specify an impact-rated system only when the project risk assessment calls for one. Document the design objective, likely vehicle types, approach paths, and consequences of an impact.
Impact performance Check whether a tested vehicle-impact rating is required by the owner, risk assessment, or authority having jurisdiction. Where a rating is specified, confirm the test standard, vehicle mass, impact speed, penetration distance, and installation conditions. Performance depends on the complete bollard and foundation system. Review current test documentation and confirm that the proposed foundation, spacing, and substrate match the tested configuration.
Tee head shape and projections Review the crosspiece for sharp edges, snag points, protrusions, and potential conflicts with circulation paths. Choose a head profile and orientation that are easy to see and do not create avoidable hazards for pedestrians, wheelchair users, or people carrying items. Check product drawings and assess the bollard at pedestrian eye level and along the full accessible route.
Accessible route clearance Measure the clear width between bollards and between bollards and other obstructions. Keep the required accessible-route width unobstructed. In the United States, the ADA Standards generally require a 36-inch minimum clear width for accessible routes, with specific exceptions and additional requirements; local rules may differ. Confirm the applicable accessibility code, measure the narrowest point, and account for bollard heads, bases, rails, and adjacent street furniture.
Detectability and visibility Consider whether users can notice the bollard and identify its location in daylight, low light, and busy surroundings. Use visual contrast where appropriate and avoid placing bollards where they blend into the background. Do not rely on color alone as a substitute for a compliant accessible design. Review contrast, lighting, sightlines, and the needs of people with low vision. Check local accessibility guidance for specific requirements.
Spacing and access control Set spacing to manage vehicle entry while preserving the required pedestrian and mobility-device passage. There is no single spacing that suits every site. Consider the intended vehicle, turning path, pedestrian flow, and the clear opening required by applicable codes. Show dimensions on the site plan and test the layout against vehicle swept paths and accessible-route measurements.
Mounting and foundation Choose between embedded, surface-mounted, or removable designs based on the slab, utilities, and operational needs. Impact resistance depends on correct anchorage and substrate. Surface-mounted units may be unsuitable where high-impact performance is required unless the complete system is specifically designed and tested for it. Confirm slab thickness, concrete strength, reinforcement, edge distances, anchor details, underground services, and installation instructions.
Materials and environment Assess exposure to weather, de-icing salts, coastal air, cleaning chemicals, and potential corrosion. Select materials and finishes suitable for the site conditions. Include a maintenance plan for coatings, fasteners, and any reflective or contrasting elements. Check material specifications, corrosion protection, drainage, and the availability of replacement parts.
Utilities and underground constraints Identify buried electrical, water, drainage, communications, and other services before selecting locations. Foundations and anchors can conflict with underground infrastructure. Coordinate bollard locations with utility records and site investigations before excavation. Obtain utility plans, arrange required locating services, and confirm clearances with the relevant utility providers.
Local approvals and standards Identify building, fire, planning, roadway, accessibility, and security requirements that apply to the site. Requirements vary by jurisdiction and project type. Bollards must not reduce required egress, emergency access, accessible circulation, or sightlines. Confirm the current adopted codes and obtain approval from the authority having jurisdiction before procurement and installation.
Maintenance and lifecycle Consider inspection access, repair needs, replacement procedures, and exposure to routine vehicle contact. Plan for periodic checks of stability, anchors, finish condition, visibility features, and damage. Removable units may require controlled storage and access procedures. Include inspection frequency, responsible parties, and repair criteria in the site maintenance plan.

Assess Durability, Maintenance, and Total Project Cost

A tee head bollard should suit the site, not just the drawing. Check the material, wall thickness, protective finish, and anchoring details against expected use and local exposure. Coastal air, road salt, and frequent contact can speed corrosion or damage coatings. A durable finish helps, but it is not maintenance-free. Looks matter. Check that the tee head is comfortable to grip and has no sharp edges. A detail that seems minor on paper can matter to daily users.

Tips: Inspect welds, coating, and base fixings during routine site checks. Look for chips, rust, loose anchors, or water pooling around the base. Record small defects before they grow.

Compare total project cost, not only the purchase price. Include delivery, foundations, installation labor, inspections, and likely coating repairs. Removable or surface-mounted designs may simplify some work, but their suitability depends on the site and required fixing method. Ask suppliers for material specifications and care instructions, then compare like for like. If replacement requires cutting paving or closing an access route, that disruption has a cost too. Estimates can miss these details; allow a practical maintenance budget rather than assuming the bollard will stay untouched.

How to Choose a Tee Head Bollard: 20-Year Cost Comparison

How to read this: This illustrative planning scenario compares estimated per-unit purchase and installation, maintenance, and replacement costs over 20 years. It assumes painted steel is recoated three times and replaced once, galvanized steel receives one touch-up, and 316 stainless steel receives routine cleaning. Actual costs and service life depend on local prices, exposure, installation, and damage; use project quotes and maintenance requirements for your estimate.

Article Source:

Site Feedback
Close